Once I learned that natural light was the best way to photograph food, I quit using flash for good! I even quit baking at night and started baking in the morning so by the time I got finished, I could use the natural light from my kitchen window to photograph the finished product.
But that's changed lately. It's been cloudy for a couple of weeks now and I can't seem to get a good picture.
Which is where a light box comes in handy!
No need to buy one. I'll show you how to make one!!
Homemade Light Box
You'll need:
1 big box
some tissue paper or other semi-transparent paper
scissors
 |
| Cut out the centers of the sides of the box. Leave one side, though! |
 |
| It will look like this. |
 |
| Fill the sides of your cut out box with paper. |
 |
| You'll need more lights than this, but this is the gist. Simple!!!!! |
After all of that hard work, you'll probably need some blondies. ;)
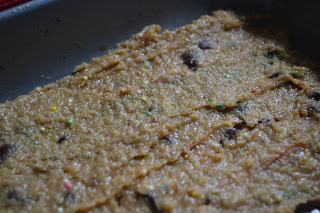
I took this from Katie. They have beans in them, but I trusted Katie's judgement and made them anyway. I'm impressed!! I wasn't expecting them to be that good. I took mine out a little early so they were gooey and delicious! If you're looking for a low-cal treat, these are the ones you should make. My only complaint is that the flax seeds made them a little grainy, so next time I might sub in flour instead.
Low Cal Blondies
For this delicious recipe, click here: Choc. Covered Katie
For this delicious recipe, click here: Choc. Covered Katie


Oh cool tutorial! I have huge windows thankfully in my home so I get lucky with light. Lovely treat.
ReplyDeleteOh cool tutorial! I have huge windows thankfully in my home so I get lucky with light. Lovely treat.
ReplyDeletei love the light box technique. And I agree, natural lighting rocks! now if only mother nature would agree. Maybe she needs a blondie.
ReplyDelete;)
Hi Katie,
ReplyDeleteI sent you an email. Please let me know if you didn't get it. It's muy importante!
so cool! will bookmark this with my cookmarked.com account! can't wait to try.
ReplyDeleteHow smart! I can sympathize with bad light, especially in the winter. I'm so glad the days are longer now so I don't have to worry quite as much. Still, those rainy days can be a pain.
ReplyDeleteI made dessert hummus and was actually surprised at how good it was (especially after chilling in the fridge for several hours)! I may just have to give these a try.
ReplyDeleteThose blondies look great! I know where to find chickpea flour so I might buy a bag and start experimenting. I'd love to make these!
ReplyDeleteIt's so interesting 'cause the dessert I posted today was adapted from one of Katie's recipes. :)
Light boxes are great! My husband made me one several years ago, and I photograph most everything I make in it. We get very little natural light coming into our apartment because of all the shade trees around us.
Occasionally I'll photograph something on our balcony, but most of the time the lighting is just way too harsh.
Anyway, it's great to be able to be take food photos in the do-it-yourself light box! It's so convenient! :)
How clever that you made a light box and those blondies look delicious :)
ReplyDeleteHey that's great! your pictures look really great ans luminous. And the recipe looks tasty. And you don't imagine there's chickpeas in it!
ReplyDeleteYou are too clever! Love the light box, such a good idea. And your pictures look fabulous :) And mighty tasty I may add!
ReplyDeleteThanks for the light box tips, and as for the blondies... YUM EEEEEEE!
ReplyDeleteThanks for sharing Katie's recipe. I used white kidney beans instead. Then substituted 1/4 cup agave and used carob chips. I then topped it off with a thin layer of "chocolate frosting"... (which is equal parts of maple syrup and unsweetened cocoa powder)... cut them into small pieces, wrapped up individually and put them into the freezer. When I get a cakey chocolate craving, I grab one from the freezer and it satisfies my cravings... yum... each one of mine were 90 cals per square.
ReplyDelete